 Try this styleon your selfie · free
How to Do a Natural Flush With Just Three Products
Published August 11, 2026
A fresh, lit-from-within flush needs only three products and about ninety seconds.
The Three-Product Philosophy
A natural flush isn't about layering ten products, it's about three that do a lot with a little. The goal is skin that looks like your own on its best day: even, warm, and glowing from within, as if you've just come back from a brisk walk. The three products that get you there are a tinted hydrator or light base for evenness, a cream blush for that flushed warmth, and a cream or liquid highlighter for the dewy glow. Cream formulas are the secret because they melt into skin and look like the skin itself rather than sitting on top. This minimalist approach is faster, more forgiving, and far more natural than a full face, which makes it perfect for everyday, no-makeup-makeup days, or anyone just starting out. Three products, applied with your fingers, and you're genuinely done.
Product One: A Light, Even Base
Start with a sheer base that evens skin without masking it, a tinted moisturizer, skin tint, or a light BB cream. The point is to even out redness and dullness while letting your real skin show through, because heavy full-coverage foundation kills the natural-flush effect. Apply a small amount with clean fingers, pressing and patting it into the center of your face and blending outward, so coverage is concentrated where you need it and sheers off toward the edges. Skip powdering everything; leave the skin with a little natural moisture so the cream products to come can grip and blend. If you have specific spots that bother you, dab a touch more on just those, rather than coating the whole face. This first product is the canvas: even enough to look polished, sheer enough to still look like you.
Product Two: Cream Blush for the Flush
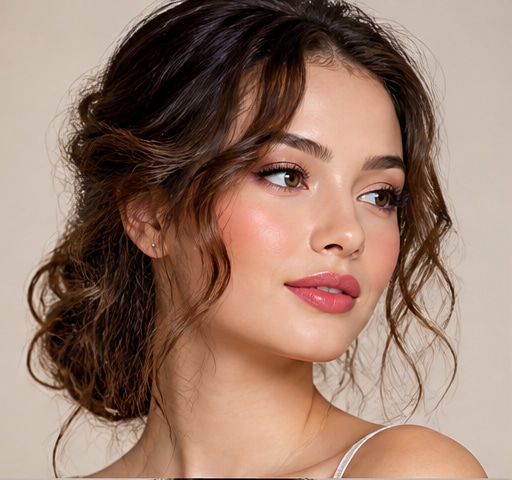
Cream blush is the heart of a natural flush, because it gives that warmed-from-within color that powder can't quite fake. Choose a soft, warm shade that mimics how you naturally flush: peachy pinks and soft roses for fair skin, peach and warm coral for medium, rich rose and warm berry for deep skin. Dot a small amount onto the apples of your cheeks, smile to find them, and tap it outward and slightly up with your fingertips while it's still movable, which is only a few seconds, so work fast and build gradually. For extra realism, you can carry the tiniest bit across the nose for a sun-flushed effect. The fingertip warmth helps it melt into the skin seamlessly. Stop while it still looks like a healthy flush rather than obvious blush, since a little goes a surprisingly long way.
Product Three: A Dewy Highlight
The third product, a cream or liquid highlighter, adds the lit-from-within glow that makes a flush look alive rather than flat. Tap a tiny amount onto the high points where light naturally hits: the tops of the cheekbones, just above your blush, the bridge of the nose, the cupid's bow, and a touch on the inner corners of the eyes if you like. Use your fingertip and press, don't drag, so it sits like a sheen on the skin. Choose a luminous, finely milled formula rather than a chunky-glitter one, because the natural look is about a soft glow, not sparkle. The placement above the blush is what creates dimension and that fresh, dewy finish. Keep it subtle; you want people to think your skin looks great, not to notice the highlighter itself. This final layer ties the whole flush together.
Application Order and Technique
Order and technique matter as much as the products. Go base first, then blush, then highlight, because layering cream over cream while each is still slightly tacky lets them blend into one seamless, skin-like finish. Use your fingers throughout: the warmth of your fingertips melts cream products in far better than a brush, and you have precise control to build slowly. Work in thin layers and tap rather than rub, which keeps everything sheer and even. If you ever apply too much blush, don't panic, just tap a little of your base over the top to sheer it back, which is another reason cream products are so forgiving. The whole sequence takes well under two minutes once you've done it a few times, and the patting technique is what makes three simple products look intentional and polished rather than basic.
Make It Last and Adapt It
To keep a cream-based flush going, you can lightly press a matching powder blush over the cream once it's set, which locks in the color without sacrificing the natural finish, and a quick spritz of setting spray helps everything stay put. For touch-ups, a small dab of cream blush on the go refreshes the look instantly. This three-product routine also adapts easily: add a tinted brow gel and a lip balm with a hint of color and you've got a complete five-minute face; keep it bare for true no-makeup-makeup. As your skin changes with the seasons, shift your base coverage and blush warmth to match. The beauty of the method is its flexibility and speed, proof that a glowing, natural flush was never about owning a huge makeup bag, just three well-chosen products and your own fingertips.
The quick checklist
- Use a sheer base, a cream blush, and a dewy highlighter, nothing more
- Apply everything with warm fingertips, pressing instead of dragging
- Concentrate base coverage in the center and sheer it outward
- Tap cream blush on the apples while it's still movable
- Place highlight on the high points just above the blush
- Choose warm blush tones that mimic your natural flush
- Sheer back excess blush by tapping base over the top
- Set with a matching powder blush and setting spray to last
✦ Free to start✨ Try these looks on your own selfie with GlowMaxing →Upload one selfie and try any hairstyle, color or makeup look instantly with AI. Free to start.Download on theApp Store