 Try this styleon your selfie · free
Monolid Makeup: Eye Looks That Actually Pop
Published July 30, 2026
Forget the rules written for creased lids — here's how to make monolid eyes the main event.
Understanding the Monolid Canvas
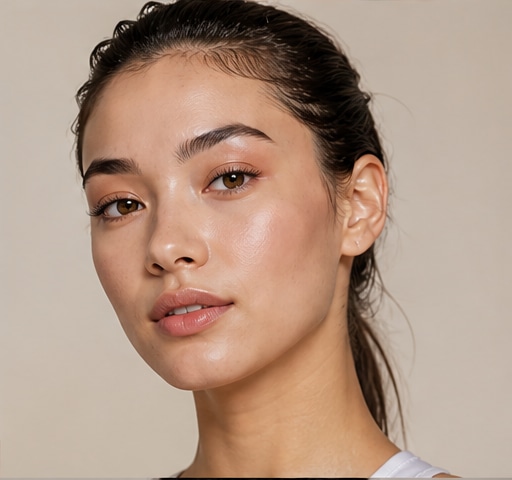
A monolid has little or no visible crease, which means the lid stays smooth and flat when your eyes are open. Most mainstream eyeshadow tutorials are built around a crease you don't have, so following them leaves color hidden or smudged onto the brow bone. The reframe is simple: a monolid isn't a limitation, it's a different, larger, smoother canvas with its own best techniques. Because there's no fold to break up the color, monolid eyes can carry bold, graphic, and gradient looks beautifully — the lid reads as one clean surface that color sits on fully. The two governing principles are placement and longevity: you build dimension upward so it stays visible when your eyes are open, and you prime well because a flat lid means more contact and more chance of transfer if you skip that step.
Prime So Color Stays Put
Priming is non-negotiable for monolids because the lid's flat surface presses against itself, which means unset shadow and liner transfer onto the upper lid easily — the dreaded smudge line. Start with an eye primer or a thin layer of concealer locked down with a dusting of translucent powder, which gives shadow something to grip and dramatically extends wear. Long-wearing, waterproof, and smudge-proof formulas are your best friends here: cream shadows that dry down, gel liners, and waterproof mascara all resist transfer far better than their regular versions. If you've ever done a gorgeous monolid look that printed onto your upper lid an hour later, the culprit was almost always skipped priming or a non-waterproof liner. Set everything, choose transfer-resistant products, and your look will stay crisp and visible from morning straight through the evening.
Building Dimension That Shows When Open
The single most important monolid technique is building your gradient higher than you would on a creased eye. Place your transition and deeper shades above where a natural crease would sit, so the color remains visible when your eyes are open rather than disappearing into the lid. Start with a transition shade swept upward and outward, then layer a deeper shade closer to the lash line and blend it up, creating a gradient from dark at the lashes to light toward the brow. Keep your eyes open while you check placement, since looking down hides exactly the problem you're solving. Extending shades slightly past the outer corner and winging them up adds lift. This vertical gradient is what gives monolids depth and dimension — it's the equivalent of a crease, drawn intentionally where it shows.
Liner and Lashes for Lift and Pop
Liner is where monolids shine, because the smooth lid is the perfect canvas for crisp graphic shapes. A bold winged liner reads beautifully and adds instant lift; the trick is to make the wing thick enough to be visible when your eyes are open, since a thin line can vanish into the lid. Tightline your upper waterline to make lashes look denser and define the eye without adding bulk. Pulling liner slightly upward and outward at the outer corner gives a lifted, elongated shape. Lashes do heavy lifting too: curl hard at the base and use a lengthening, volumizing waterproof mascara, or add winged falsies that are longer toward the outer corner for a foxy lift. Avoid heavy lower liner all the way around, which can close the eye in; a soft smudge on the outer third opens it instead.
Standout Looks and Previewing Them
Monolids carry certain looks better than creased eyes ever could. A clean graphic liner — a sharp wing, a floating line, or a double-line look — sits flawlessly on the flat lid and is genuinely a signature monolid strength. Gradient smoky eyes look incredible because the smooth surface lets color blend seamlessly from dark to light. A pop of metallic or glitter patted onto the center of the lid catches light dramatically since there's no crease to interrupt it. Bold, fully colored lids — a wash of jewel-toned shadow lined and lashed — make a real statement. If you want to test whether a graphic wing, a smoky gradient, or a bold color suits your eye shape before committing, you can preview the look on your own selfie with GlowMaxing and compare options side by side. Monolids are made for high-impact, and these are the looks that prove it.
Quick Mistakes to Avoid
A few common slip-ups undo otherwise great monolid looks. The first is placing shadow too low — keep it where it shows with eyes open, not tucked into a crease that isn't there. The second is skipping primer and waterproof formulas, which leads to transfer and a smudged line within the hour. The third is a wing that's too thin to see; on a flat lid, go slightly bolder than you think. Heavy all-around lower liner closes the eye, so reserve it for the outer corner. Over-blending into nothing erases the dimension you worked to build, so keep your deepest shade defined near the lash line. And blending up onto the brow bone wastes color where no one sees it; concentrate your gradient on the visible lid. Fix these, and monolid eyes don't just work — they genuinely pop.
The quick checklist
- Prime and powder the lid to prevent transfer
- Choose waterproof, smudge-proof liner and mascara
- Build your gradient higher so it shows with eyes open
- Check placement with your eyes open, not looking down
- Make winged liner thick enough to be visible
- Pat metallic or glitter on the lid center for a light-catching pop
- Keep lower liner to the outer third to avoid closing the eye
✦ Free to start✨ Try these looks on your own selfie with GlowMaxing →Upload one selfie and try any hairstyle, color or makeup look instantly with AI. Free to start.Download on theApp Store