 Try this styleon your selfie · free
How to Fake Fuller Lips With Liner and Gloss
Published September 30, 2026
No filler required — strategic liner, light, and gloss can make your lips look visibly plumper in two minutes.
The Optical Trick Behind Fuller-Looking Lips
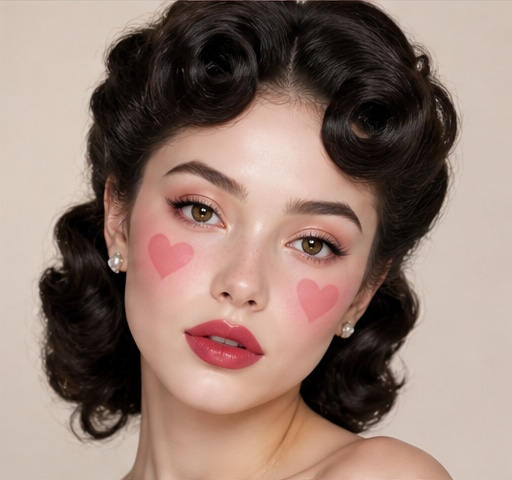
Faking fuller lips is pure optical illusion, and it rests on two principles: edges and light. Slightly extending and defining the lip edge makes the lip read as larger, while strategic light on the center makes it look like it's projecting forward, which the eye interprets as plumpness. You don't need to draw way outside your natural line — that looks obvious and ages quickly. The convincing version stays close to your real shape, overlining only by a hair where it counts, and uses light, color, and gloss to do the heavy lifting. Master the combination of a precise, slightly-extended liner and a well-placed highlight, and you get a fuller pout that still looks like your own lips, only better.
Prep and Map Your Natural Lip Line
Start with smooth lips: a quick exfoliating scrub and a swipe of balm so liner glides and doesn't catch on flakes. Let the balm absorb so the liner grips. Then look straight into a mirror and identify your natural lip line and your cupid's bow. The plan is to overline only slightly — about a millimeter beyond your natural edge at most — focusing on the center of the top lip and the fullest part of the bottom lip, where extra width reads as fullness. Avoid overlining the corners, which looks unnatural and clownish. Choosing a liner that matches your natural lip color or your lipstick exactly is what keeps the slight extension invisible, so the lip looks genuinely bigger rather than obviously drawn on.
Overline Strategically for Natural Fullness
Use short, feathered strokes rather than one hard outline, building the shape gradually so it stays soft. Extend just past your natural line on the cupid's bow to lift and define the top, and on the center of the bottom lip to add height, then connect smoothly back to your real line toward the corners. Exaggerate the cupid's bow peaks slightly for definition. Once the outline is set, lightly fill the whole lip with the liner — this gives color something to grip and stops a visible ring when the lipstick wears down. Keep checking from straight on and make sure both sides are symmetrical. The goal is a shape that looks like your lips on their fullest day, not a tracing that floats off the edge.
Use Light and Shade to Add Dimension
Here's where lips go from outlined to genuinely three-dimensional. After applying your lip color, dab a tiny dot of a slightly lighter lipstick or concealer onto the very center of both the top and bottom lips and blend it softly outward. This central highlight mimics how light naturally hits a fuller, projecting lip and instantly adds the illusion of volume. For even more depth, you can add a whisper of a darker shade at the outer corners and blend inward, creating an ombré that makes the center pop forward. Keep both subtle — heavy contrast looks muddy. A tiny touch of highlighter just above the cupid's bow lifts and accentuates the top lip too. These light tricks are what separate a flat lip from a plump-looking one.
Finish With Gloss in the Right Spot
Gloss is the finishing move because shine reflects light, and reflected light reads as fullness. But don't coat the whole lip flatly — concentrate the glossiest, shiniest part in the center of both lips, the same spot you highlighted, to maximize the projecting effect. A clear or sheer gloss keeps the focus on dimension; a plumping gloss with a gentle tingle adds a temporary, subtle swell from increased circulation. Tap, don't smear, so the shine stays placed. If you want to see how a fuller lip changes your whole face before you experiment with shades, you can preview the look on your own selfie with GlowMaxing. Finish by checking that the gloss center catches the light when you smile, which is the cue the eye reads as a plump pout.
Make It Last and Avoid the Telltale Mistakes
Longevity matters, because smudged overlined liner is an instant giveaway. Set your lip color by blotting with a tissue and pressing a tiny bit of translucent powder over it before the final gloss layer, which locks the shape. Reapply gloss to the center as needed without disturbing the liner. The mistakes to avoid: overlining too far (stick close to your line), using a liner darker than your lipstick (it creates a harsh ring), coating the whole lip in flat gloss (kills dimension), and skipping the central highlight (the biggest source of fake fullness). Keep everything in the same color family and well blended. Done right, the look reads as naturally full lips that photograph beautifully and hold up through a meal with just a quick gloss touch-up.
The quick checklist
- Exfoliate and balm first so liner glides and the shape stays clean.
- Overline only about a millimeter, focusing on the center of each lip.
- Match liner to your lip or lipstick color to keep the extension invisible.
- Fill the whole lip with liner so no ring shows as color wears off.
- Dab a lighter shade in the lip center to fake projecting fullness.
- Place the glossiest shine in the center, not flat across the whole lip.
- Set with a tissue blot and light powder before the final gloss layer.
- Keep everything in one color family and avoid a darker liner ring.
✦ Free to start✨ Try these looks on your own selfie with GlowMaxing →Upload one selfie and try any hairstyle, color or makeup look instantly with AI. Free to start.Download on theApp Store