 Try this styleon your selfie · free
How to Apply Bronzer for a Natural Sun-Kissed Glow
Published October 1, 2026
Place it where the sun would actually hit, blend like you mean it, and skip the muddy mistakes.
Bronzer vs Contour: Know the Difference
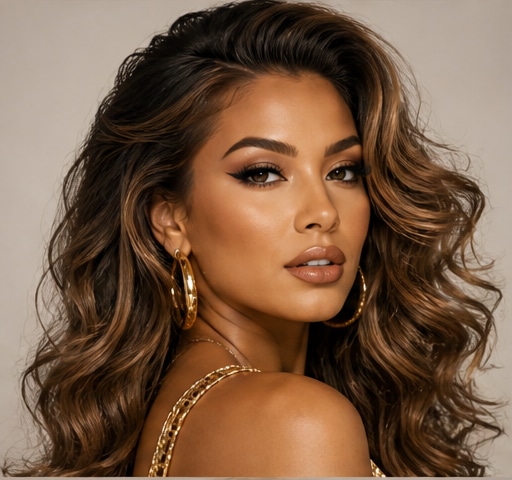
Before you pick up a brush, understand what bronzer is for. Bronzer warms the skin to mimic a natural tan; contour sculpts and creates shadow. They are not interchangeable. Bronzer should be warm — golden, peachy, or caramel depending on your depth — while contour is cool and grey-toned to read as a believable shadow. Using a too-cool bronzer is the number one reason people end up looking muddy or dirty rather than sun-kissed. Bronzer goes on the high points where the sun naturally hits: the tops of the cheeks, the temples, the bridge of the nose, and along the jaw. Contour tucks into hollows. If your only goal is that healthy, just-back-from-vacation warmth, you want a true bronzer in a shade only one to two steps deeper than your skin.
Where to Actually Place It
Think about where the sun naturally lands on your face, and follow that map. The classic technique is a soft number-three shape on each side: start at the forehead near the hairline, sweep down the temple, curve in along the top of the cheekbone, and finish at the jaw. Add a light swipe across the bridge and tip of the nose and a dusting on the high points of the cheeks. This frames the face and creates warmth exactly where real sun exposure would. Keep it on the upper two-thirds of the face — dragging bronzer too low or too central makes it look like contour gone wrong. Less is more on the first pass; you can always build. Concentrate color at the edges of the face and fade inward for the most natural gradient.
Powder vs Cream vs Liquid
Your formula should match your skin type and the finish you want. Powder bronzer is the most forgiving and buildable, ideal for beginners and oily skin, and it layers beautifully over a powder-set base. Cream and liquid bronzers melt into the skin for a dewy, lit-from-within glow and suit dry or normal skin, but they need to go on before any powder or they'll grab and streak. A common order: cream bronzer on bare or freshly foundationed skin, set with powder, then a whisper of powder bronzer on top to lock it and deepen the warmth. If you're new, start with powder — it's much harder to overdo. Whatever you choose, build in thin layers rather than loading the brush once and hoping for the best.
Tools and Technique for a Seamless Blend
The tool matters as much as the product. For powder, use a soft, slightly tapered fluffy brush — not a dense one, which deposits too much pigment in one spot. Tap off excess before touching your face, then apply with light, sweeping motions, building gradually. For cream and liquid, a damp makeup sponge or your fingertips blend the most seamlessly; bounce and press rather than drag. The single most important habit is blending until there are no hard edges anywhere — a visible line of bronzer ruins the natural effect instantly. Go back over the borders with a clean fluffy brush to diffuse. Work in good daylight if you can, since indoor lighting hides patchiness that the sun will reveal the moment you step outside.
Avoiding the Most Common Mistakes
A few errors turn sun-kissed into sun-damaged-looking. First, choosing a shade too dark or too orange — stay within two shades of your skin and lean warm-neutral, not muddy. Second, applying too much at once; thin layers are always fixable, a heavy hand is not. Third, forgetting to connect the dots — if you bronze your face but leave your neck pale, the line of demarcation gives you away, so carry a little warmth down the neck and onto the ears. Fourth, skipping blush; bronzer alone can look flat and lifeless, so add a pop of blush on the apples to bring the face back to life. Finally, applying bronzer in bad lighting. A quick check in natural light before you leave catches stripes and patches every time.
Finding Your Perfect Shade and Placement
The hardest part is choosing a shade and placement that flatter your specific face shape and coloring, and that's where a little previewing saves you from a wasted purchase. Fairer skin usually wants a soft, neutral-tan bronzer applied with a light hand; medium skin can handle warmer caramel tones; deeper skin glows in rich golden-bronze and amber shades that would simply disappear on lighter complexions. Face shape changes placement too — rounder faces benefit from more temple and jaw warmth, while longer faces want to keep bronzer higher and more horizontal. To take the guesswork out, you can upload a selfie to GlowMaxing and preview how different sun-kissed makeup looks read on your own features before you buy or apply. Then recreate the placement that flattered you most with the technique above.
The quick checklist
- Choose a warm bronzer only one to two shades deeper than your skin
- Apply in a soft number-three shape: forehead, temple, cheekbone, jaw
- Keep bronzer on the high points where the sun naturally hits
- Use a soft fluffy brush for powder; a damp sponge or fingers for cream
- Build in thin layers and blend until there are no hard edges
- Carry warmth down to the neck and ears to avoid a demarcation line
- Always add blush so the face doesn't look flat
- Check your finish in natural daylight before heading out
✦ Free to start✨ Try these looks on your own selfie with GlowMaxing →Upload one selfie and try any hairstyle, color or makeup look instantly with AI. Free to start.Download on theApp Store