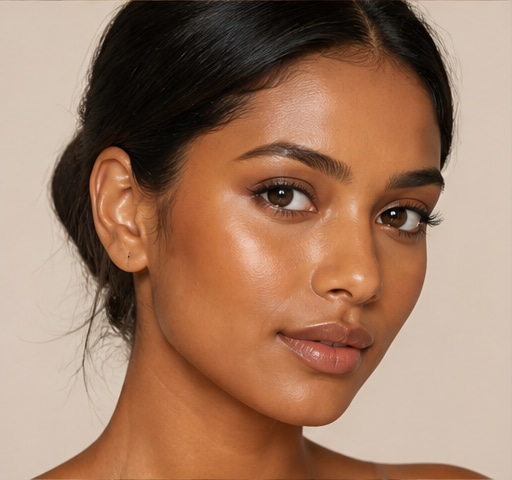
 Try this styleon your selfie · free
Contouring Your Face With Strategic Hair Color
Published August 22, 2026
Hair color is contour you wear every day — learn the light-and-shadow rules that sculpt your features from the roots out.
Hair Color Is Contour You Can't Wipe Off
Makeup contour uses light shades to bring features forward and dark shades to push them back. Hair color works on the exact same optical principle, except it frames your whole face and lasts for weeks. Bright, light pieces advance and widen whatever they sit beside; deeper, cooler tones recede and slim. Once you understand that, every placement decision becomes intentional: you're deciding which features to highlight and which to quietly downplay. This is why two people with identical balayage can get totally different effects — placement relative to their bone structure changes everything. The technique pros use is sometimes called face-framing or 'contouring color,' and it's the difference between color that just looks pretty and color that actually flatters your specific face.
The Two Rules That Govern Everything
Strip it down and there are only two rules. First: light brings forward and widens. Place brightness where you want the eye to go and where you want to add fullness — typically the cheekbones, the area around the eyes, and the crown for lift. Second: dark recedes and slims. Keep depth where you want to narrow or soften — the perimeter of a round face, the corners of a square jaw, the temples of a wide forehead. Every face-shape strategy is just these two rules applied to different bone structures. Round faces get vertical light and dark perimeters; long faces get horizontal cheekbone light; square jaws get high light and low shadow. Memorize the two rules and you can reason your way to flattering placement on any face without memorizing a chart.
Sculpting the Cheekbones
The cheekbones are the feature most people want to emphasize, and color does it beautifully. A face-framing money-piece or babylights that catch the light right at the cheekbone draw the eye to that high point and create the impression of lifted, defined bone structure. For extra sculpt, pair the cheekbone brightness with slightly deeper tones just below, along the lower cheek and jaw — that light-above, shadow-below pattern mimics exactly what a contour brush does. Keep the brightest pieces relatively fine and well-blended so they read as natural highlight rather than chunky stripes. This works on every face shape because everyone benefits from lifted cheekbones; it's simply the most universally flattering application of contouring color, and a great place to start if you're new to thinking about color this way.
Downplaying What You Want to Soften
The shadow half of contouring is underused and powerful. Want to narrow a wide forehead? Keep the temples and front hairline deeper. Want to soften a strong jaw? Shadow the jaw corners. Want to slim a round face? Deepen the perimeter and roots. The trick is that these shadows should be subtle and blended — lowlights tucked under brighter top sections, or a richer root that melts up, not obvious dark blocks. Because we read recessed, shadowed areas as 'further back,' deepening a feature makes it visually smaller and softer. This is why going lighter all over isn't always more flattering; sometimes adding strategic depth does more for your face than any amount of brightness. Diagnose which features you'd rather downplay, then place your shadow there deliberately.
Cool vs. Warm as a Contouring Tool
Temperature is a second lever alongside light and dark. Cool tones — ash, mushroom, beige — recede slightly and read as more slimming and refined, which is why they suit faces that want narrowing. Warm tones — gold, honey, copper, caramel — advance and add a sense of fullness and softness, perfect for faces that want width or warmth. You can mix them within one head: cooler depth at the perimeter to slim, warmer brightness at the cheekbone to glow. Skin undertone matters too, but for pure contouring effect, think of cool as your shadow temperature and warm as your highlight temperature. Combining the light-dark rule with the cool-warm rule gives you four tools instead of two, and that's enough to sculpt almost any feature you want to play up or quiet down.
Map Your Face Before You Color
Contouring color is precise, so guessing is expensive. Before any appointment, take an honest look at your face and decide what you want to bring forward (usually cheekbones and eyes) and what you'd rather soften (a wide forehead, a strong jaw, a round perimeter). Then translate that into placement using the two rules. To make it concrete, upload a front-facing selfie to GlowMaxing and preview a few contouring-color combinations — cheekbone brightness with perimeter depth, warm highlights versus cool — so you can see the sculpting effect on your actual bone structure rather than imagining it. Save the most flattering version and bring it to your colorist along with a plain-language map: 'light here, deeper here.' That combination of reference image and intention is exactly how stylists place foils to contour rather than just lighten.
The quick checklist
- Remember the two rules: light advances and widens, dark recedes and slims
- Place cheekbone brightness to lift and define — it flatters every face
- Add subtle depth below the cheek to mimic a contour shadow
- Use deeper tones at temples, jaw corners, or perimeter to soften features
- Treat cool tones as your shadow and warm tones as your highlight
- Decide what to emphasize and what to downplay before you book
- Preview contouring placements on a selfie to see the sculpt on your own face
✦ Free to start✨ Try these looks on your own selfie with GlowMaxing →Upload one selfie and try any hairstyle, color or makeup look instantly with AI. Free to start.Download on theApp Store